
How to Assemble your Log Grab (From Bucket Removal to Operation)
Working on slopes is risky. Excavation and soil stabilisation must be done right.This checklist focuses on safely excavating slopes and stabilising them afterward.
Phase 1: Planning and Assessment
Before you move any soil, write a clear plan. Safety begins with that plan.
- Know Your Soil
Understanding the soil conditions affects how steep your mini excavator can safely operate and how steep a finished slope can remain stable.
Here’s what soil type means in terms of safe slope angles for excavation design:
- Type A: The most stable (e.g., hard clay). It can typically stand at slopes as steep as 3/4:1 (75 degrees).
- Type B: Medium stability (e.g., granular cohesionless soils). Highest safe slope is 1:1 (45 degrees).
- Type C: The least stable (e.g., sand, gravel, soft clay). Highest safe slope is 1 1/2:1 (34 degrees). Do not ignore this rule.
If you have layers of different soil types, you must treat the whole area as the least stable type present (Type C). And if you find water seepage, stability drops fast. Always get a geotechnical engineer involved for large or deep cuts. They provide the necessary, honest feedback you need to proceed safely.

- Locate Utilities
Call 811 (or your local utility line service). You must know where underground lines are. Hitting a gas line or an electric cable is not just costly, it can be deadly.
- Plan for Water
Water destroys stable soil. A little rain can cause a stable slope into a landslide.
- Figure out how you will divert surface water away from the excavation.
- Plan for dewatering if groundwater is high. Use pumps or trenches if needed.
- Do not allow water to pond at the top or bottom of the slope.
- Site Access and Equipment
Ensure your machinery can safely access both the top and bottom of the slope. Heavy equipment can cause vibration, which can loosen soil.
- Be aware that powerful machines are also heavier, which increases ground pressure and can worsen stability on soft or loose soil. Explore machines designed for mid-sized jobs that require power and precision.
- Ensure haul routes for dirt removal are stable and not too steep for the dump trucks or loaders.
Phase 2: Excavation Checklist
This is when the work starts. Stick to these rules. Vigilance is key.
1. Establish a Clear Work Zone
Keep people and equipment away from the edge of the slope. Use barrier fencing or clear signage. No one should be allowed near the base unless they are actively working there and the area has been confirmed as stable.
- The spoil pile (excavated dirt) must be kept far back from the edge. A good rule is to keep it at least two feet away, but further is always better. The weight of the spoil pile adds stress and can cause a slide or slab failure on the top bench.
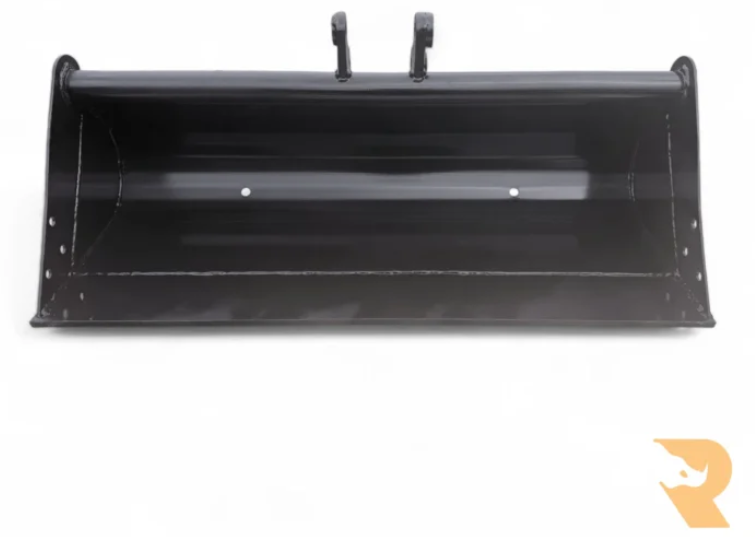
2. Use the Right Tools for Precision
Excavating a slope to a precise, safe angle requires more than a standard digging bucket. You need a Tilt Bucket.
- The Tilt Bucketis a grading bucket that can pivot up to 45 degrees left or right. It allows the operator to maintain the exact slope ratio (such as 2:1 or 3:1) without constantly moving or repositioning the entire excavator. Staying in one safe spot reduces machine wear and the risk of instability caused by tracking on an incline. This tool is vital for accurate, safe, and professional slope finishing. For narrow trenching or drainage cuts, pair it with a digging bucket.
3. Follow Slope Ratios (Benching and Shoring)
Excavate to the maximum safe slope angle for your soil type. If you cannot do so due to site constraints, you require additional protection.
- Shoring:Use supports (like hydraulic aluminium shoring or steel plates) to hold the walls up. This is essential in deep, vertical cuts, which are common in urban areas. Shoring systems must be installed from the top down and removed from the bottom up.
- Benching:Create horizontal steps or benches along the slope face. A bench should be wide enough to catch any falling debris. This reduces the overall slope height that can fail and provides access for inspection and maintenance.
4. Check for Cracks and Movement
Inspect the slope face and the ground around the top daily, especially after rain or heavy equipment use.
- Tension cracks at the top of the slope, running parallel to the edge, are a sign that the slope is on the verge of failure.
- Listen for snapping or popping sounds from shoring timbers.
- If you see any movement or cracks, stop work immediately. Do not try to fix it until an engineer says it’s safe. Evacuate the area immediately.
Phase 3: Soil Stabilisation
Once the slope is dug, it must be made permanent. This means making sure it won’t fail later.
1. Compaction and Backfilling
Once your slope or cut has been excavated, proper backfilling and compacting are crucial for stabilising the surrounding areas. Poor compaction can lead to settling, erosion, and slope failure.
Key Steps:
- Backfill in thin lifts. Place soil in controlled layers (typically 6–12 inches thick).
- Compact each layer fully. Ensure every lift is properly compacted before adding the next to avoid voids or weak stops.
- Avoid large dumps of soil. Never pile a massive amount of soil and expect it to compact evenly because it won’t.
- Use the right compaction tool.Choose machines suited for tight or narrow excavation so you can achieve even compaction without disturbing a finished slope. For improving the quality of backfill material and separating rocks from usable soil, a riddle bucket can be extremely effective.
- Maintain slope integrity. Keep heavy equipment away from the edge to prevent vibration-related loosening of the newly excavated face. When working in hard or compacted soil layers that are difficult to break apart, using bucket teethcan significantly increase digging efficiency and improve compaction results.
2. Retaining Structures
If the slope is too steep to be stable on its own, you need a retaining wall. Retaining walls are used when excavation results in a slope that cannot stand safely on its own The design of this wall must account for the soil weight and the hydrostatic pressure (water weight) it will hold back.
- Reinforced Walls:For large slopes, walls that use geogrids or soil nails (long steel rods) inside the soil mass are highly effective. This ties the weak soil together, making it act like a strong, cohesive block.
3. Surface Protection (Erosion Control)
Rain and wind will erode the slope’s face over time. You need to protect it immediately after the final cut.
- Vegetation:Planting grass, shrubs, or other ground cover is a natural and very effective way to stabilise the soil surface. The root network acts as a natural reinforcement.
- Geotextiles:Use mats or fabric (such as erosion control blankets or fibre rolls) to cover the slope surface until vegetation can take hold. They slow down water runoff and protect the soil from the direct impact of rain.
4. Drainage
The final stabilisation step always goes back to water. Install permanent drainage features to ensure water never collects or runs directly down the slope face.
- Install surface drains (such as swales or ditches) at the top of the slope to prevent water from running down the face. Line these with rock or concrete if the slope is steep.
- Use weep holes or filter fabric behind retaining walls to relieve water pressure. If water builds up behind a wall, the pressure can easily cause it to collapse.
To handle multiple excavation tasks efficiently, from trenching to grading and material handling, a versatile mini excavator attachments set can greatly improve workflow and reduce equipment downtime.
A safe excavation requires thorough planning, meticulous attention to detail, and strict adherence to safety protocols. Follow this checklist to minimise risks, avoid costly mistakes, and ensure long-term slope stability.